因為公司需求,所以要製作一個 WordPress 版型,所以順手把一些製作重點記錄下來,給各位參考
1. 在列表頁我們通成會截取文章的一段當做摘要,通常我們使用:
<?php the_excerpt(); ?>
但如果你要調整字數,或是自訂 more 的顯示方式,必須另外寫 code 去調整,參考 wordpress 說明
http://codex.wordpress.org.cn/Function_Reference/the_excerpt
所以我們可以用另一個 function:wp_trim_words
<?php $trimmed = wp_trim_words( $text, $num_words = 55, $more = null ); ?>
用來顯示摘要只要這樣做就可以了:
<?php echo wp_trim_words( get_the_content(), 40, '...' ); ?>
字數跟 … 就再自行調整
2. 取得不同 size 的文章縮圖,the_post_thumbnail(); 如果要取得各種 size 則可以用以下:
the_post_thumbnail( 'thumbnail' );       // Thumbnail (default 150px x 150px max)
the_post_thumbnail( 'medium' );          // Medium resolution (default 300px x 300px max)
the_post_thumbnail( 'large' );           // Large resolution (default 640px x 640px max)
the_post_thumbnail( 'full' );            // Full resolution (original size uploaded)


the_post_thumbnail( array(100, 100) );  // Other resolutions
3. 自訂 Query + BootStrap 3 的分頁導航選單
先在 template 的 function.php 中增加
function wp_bs_pagination($pages = '', $range = 4)
{
$showitems = ($range * 2) + 1;
global $paged;
if(empty($paged)) $paged = 1;
if($pages == '')
{
global $wp_query;
$pages = $wp_query->max_num_pages;
if(!$pages)
{
$pages = 1;
}
}
if(1 != $pages)
{
echo '<div class="text-center">';
echo '<nav><ul class="pagination"><li class="disabled hidden-xs"><span><span aria-hidden="true">Page '.$paged.' of '.$pages.'</span></span></li>';
if($paged > 2 && $paged > $range+1 && $showitems < $pages) echo "<li><a href='".get_pagenum_link(1)."' aria-label='First'>«<span class='hidden-xs'> First</span></a></li>";
if($paged > 1 && $showitems < $pages) echo "<li><a href='".get_pagenum_link($paged - 1)."' aria-label='Previous'>‹<span class='hidden-xs'> Previous</span></a></li>";
for ($i=1; $i <= $pages; $i++)
{
if (1 != $pages &&( !($i >= $paged+$range+1 || $i <= $paged-$range-1) || $pages <= $showitems ))
{
echo ($paged == $i)? "<li class=\"active\"><span>".$i." <span class=\"sr-only\">(current)</span></span></li>":"<li><a href='".get_pagenum_link($i)."'>".$i."</a></li>";
}
}
if ($paged < $pages && $showitems < $pages) echo "<li><a href=\"".get_pagenum_link($paged + 1)."\" aria-label='Next'><span class='hidden-xs'>Next </span>›</a></li>";
if ($paged < $pages-1 && $paged+$range-1 < $pages && $showitems < $pages) echo "<li><a href='".get_pagenum_link($pages)."' aria-label='Last'><span class='hidden-xs'>Last </span>»</a></li>";
echo "</ul></nav>";
echo "</div>";
}
撈取文章
<?php
# 計算頁數
if ( get_query_var( 'paged' ) ) { $paged = get_query_var( 'paged' ); }
elseif ( get_query_var( 'page' ) ) { $paged = get_query_var( 'page' ); }
else { $paged = 1; }

# 撈取文章的條件
$args = array(
    'posts_per_page'   => 10,
    'cat'              => '',
    'orderby'          => 'date',
    'post_type'        => 'post',
    'post_status'      => 'publish',
    'paged' => $paged
);

$posts_array = new WP_Query( $args );

# 如果有文章進入迴圈
if ( $posts_array->have_posts() ) :
while( $posts_array->have_posts() ) : $posts_array->the_post(); ?>
    <section>
        <a href="<?php the_permalink(); ?>" title="<?php the_title_attribute(); ?>">
            <div class="section-img">
                <?php the_post_thumbnail(array(100, 100)); ?>
            </div>
            <div class="section-page">
                <h4><?php the_title_attribute(); ?></h4>
                <p><?php echo wp_trim_words( get_the_content(), 40, '...' ); ?></p>
            </div>
        </a>
    </section>
<?php endwhile; ?>

<footer class="entry-footer">
<?php
if (function_exists("wp_bs_pagination"))
{
    # 呼叫我們新增的 Function
    wp_bs_pagination($posts_array->max_num_pages);

}
?>
</footer>
別忘記要載入 Bootstrap 的相關檔案喔
參考資料:http://fellowtuts.com/wordpress/bootstrap-3-pagination-in-wordpress/
控制文章的條件可以參考官網說明:WP_Query
4. 取得文章的發表日期及分類
<?php echo get_the_date(); ?>
<?php echo get_the_category_list(' || '); ?> # || 是分類的分隔符號
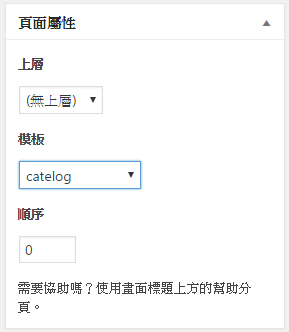
5. 自訂 Page 的 Template
開一個新的 php 檔案,上傳到正在使用的佈景資料夾內,並在檔案的第一行寫上名稱:
<?php /* Template Name: CustomPageT1 */ ?>
這樣就可以從後台新增頁面的時候選用

另外 WordPress 在選擇 template 的時候有其順序,要稍微注意:
1. category-slug.php
2. category-ID.php
3. category.php
4. archive.php
5. index.php


發佈留言